Since I've begun the renovation of this house for a profitable turn-around, I am learning mad new skills.
I grew up in a very traditional family in which the men, working in the basement with tools, would stop what they were doing if we girls came to fetch canned foods from the larder. It was secret stuff. We weren't supposed to know about it.
As I've lost 40 pounds since summer and gotten verification my health is most excellent, I've been honing new muscles working a house flip with my own gumption and strength.
First, I replaced a toilet tank float apparatus. Then, moved on to replacing a broken garbage disposal. So long as you can read instructions or watch a YouTube video, these are not as daunting as they sound. The hardest part of the disposal replacement was propping up the heavy disposal while locking into place and placing the ring clip.
First, I prefer to do things myself unless they are something of an electrical nature or heavy construction, so I focused on what I can do - demo.
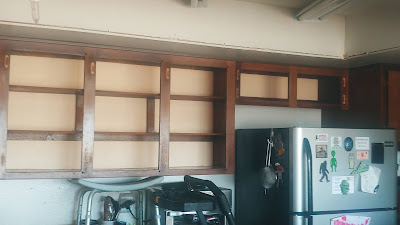
I removed the upper cabinets in this 1979 original kitchen. I propped a seat underneath so once I unscrewed it, it stayed up until I was ready to cart it off. Removing the doors first helped. I do not want to waste a single thing, so the cabinets are being affixed to the garage for a workshop area with a built-in dresser with marble top added beneath them and another set of cabinets for laundry soap near the washer and dryer. A simple towel bar hung under the cabinets allows for hanging up clothes once washed.
The 1970s called and asked for its fluorescent ceiling lights back. That had to go. I removed the ugly plastic covers from the recessed lighting. The plan is to have an electrician help remove the old lights, put in canned lights and close the ceiling.
The house is wheelchair accessible with ramps and all, so the uppers were not a necessary feature and I will admit, I would NEVER have upper cabinets in any home. The crowded and heavy uppers create a cramped work space and a sense of crowding. This kitchen has two pantries and tons of lowers, so no need for these.
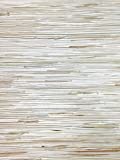
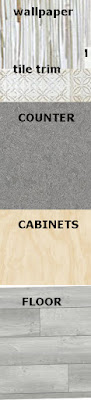
I considered tiling that wall, but realized that would be quite pricy. So, I am going to smooth the wall out and wallpaper with grasscloth. Between the counter and grasscloth, there will be a row of tile that will be a feature wall in another part of the kitchen.
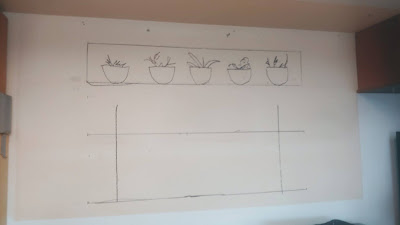
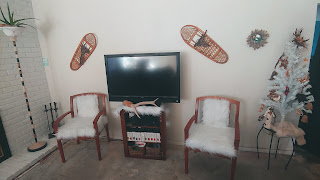
To solve the issue of the way the Arizona Room and front Living Room are separated by the closed off kitchen, I will create two windows at the top of the wall to let light back and forth; one above the main counter and one above the coffee bar to the other side of the oven. I will do free-floating shelves on the walls (drawn on picture above).
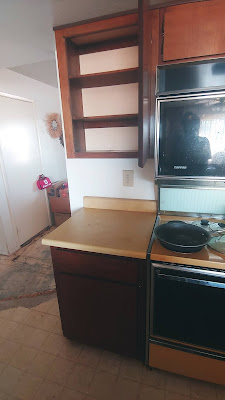
The bit of counter to the left of the 1970s stove isn't big enough for prep, but with a ceiling can light above, the cabinet above it removed, the door from that cabinet can go below where the drawer and shelf will be removed and a pull-out trash drawer will be built in. With a couple free floating shelves and hooks for coffee cups, this coffee bar/trash hidey hole are a great use of space.
The dark-stained cabinets don't match the Scandinavian vibe I have in mind for this mid century home in a retirement community.
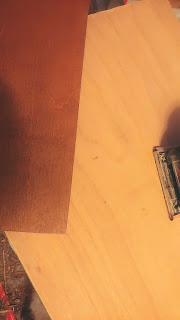
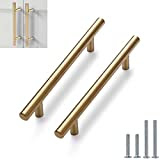
I have taken down the doors and started stripping them down to the birch color. They will be polyurethaned and brass bar handles attached. The photo below shows the old color to the left and new bare color on right. Imagine that with the grasscloth wallpaper and inexpensive charcoal counters.
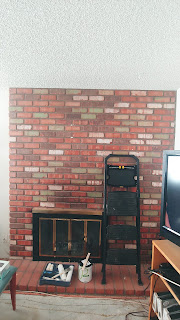
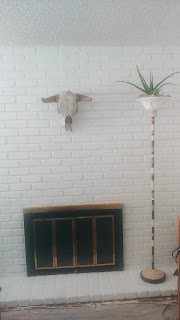
The ridiculously ugly and dark brick fireplace in the corner had a way of making the entire room look depressing and dated. A simple white paint with primer in it was ideal.
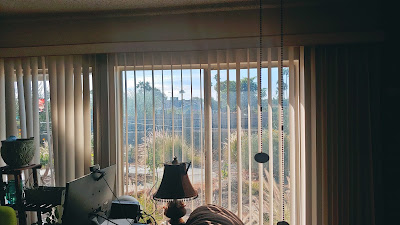
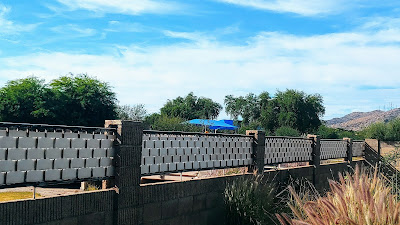
Don't underestimate the power of white paint. I went on to paint the wall beside the fireplace white, as well. I had removed the vertical blinds from the bank of windows there and used the slats to weave in and out of the bars on the backyard wall to create a mid century privacy screen.
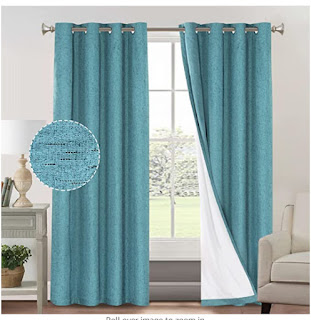
The ugly dusty blinds also were low on the wall, leaving a horizontal line that made the ceiling feel low. By removing the ugly blinds that remind one of a cheap apartment building and painting that wall white, I will put up a wall-long curtain rod near the ceiling to put up floor-length four turquoise curtain panels with weather backing to create a great blackout for intimate suppers in the dining room and TV watching. Since the house is very neutral, I figured this one place I'd put in a smack of turquoise in the drapes.
My greatest rule is to reuse every single thing I can, even if I don't know how I'll use it yet. Just put the pieces in the garage while working on the house and go "shopping" there. Be sure to check nextdoor.com as that hooks you up with the neighbors in your area who are giving away furnishings and construction scaps, landscaping stuff, if you just haul it away for them. Utliize your Goodwill and make old new again. Do any labor you can yourself, except things out of your potential wheelhouse. Find ways to avoid major tear-downs of walls and renovations that need inspection.
Have an inspiration photo.
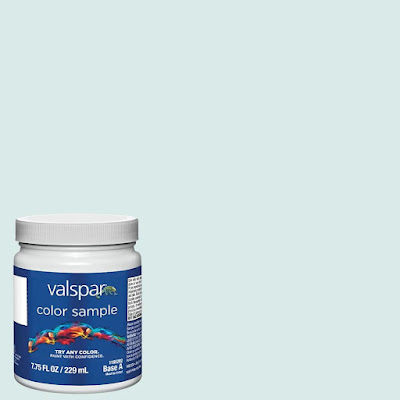
This one (above) inspired me. I wanted a simple Scandinavian birch, white, and pale aqua vibe that feels icy in this hot Arizona location. It is warm with the birch wood, but cooling with white walls, and the straw tones of basketry. The aqua comes in on a giant wall that runs from the Arizona room, through kitchen to the front living room. Since the rooms are rather separated by the wall is visualized everywhere, I decided to visually "unite" the rooms by painting the wall the bit of soft blue of Velspar "Blue Whisper" in satin.
Spend nights in the house and really feel for what you'd want if you lived there such as ceiling fans or more lighting.
Being neutral in palette doesn't have to mean brown and blah. Consider white walls to brighten and give a blank slate for new owners because it shows so well and no one will cringe at yellow or bright blue walls. Use texture to make neutral colors look interesting and touch-able.
Don't give-in to trends like stainless steel appliances. They stand out so much in the kitchen and no one wants to deal with smear marks. Try to match appliances to the cabinetry as inoffensive as possible. Granite counters might be trendy, but when it comes down to it, most people hate the busy patterns and "dirty" look. Pendant lights in a kitchen have a big bang for their buck.
Over the peninsula in this house, I am putting up these pendants utilizing that brass accent throughout the house -
And that focus wall is a small wall next to the sink that could be a real focal point, so here's my mockup of the inexpensive tiles, the pendant light, and the countertop. The tile was chosen for neutral color and texture, but also because there is a faint Scandinavian snowy vibe in this hot desert location.
The real expenses involved in this reno are appliances, flooring, and bathrooms that need desperate updating and practical layouts.
I'm very thrifty but also handy. I found these two chairs for a total of $14 at Goodwill. I loved the warm maple tone and sleek mid century/Scandinavian vibe. I plan to stage them in front of the fireplace, but I also want to keep them for myself after showing, so I am redoing the fabric from that dark color to something I've always wanted - white fur! When done, the pair will be a total of $50.
Get dimensions of spaces and items you have to work with. I had an ugly shelving unit that I measured and it exactly fit into the coat closet (something no one in Phoenix has ever used). I can shove it into the closet, paint it white and the closet now becomes a storage space (always a plus!)
Be sure to tap family too. They sometimes have ugly furniture you can redo for staging or perhaps break apart to reuse the wood. They might have landscaping items like brick edging or pots you can paint and plant bright flowers in. They may think the scraps in their garage are useless, but planks of wood are precious as gold!
Another way I make the process easier on me is to stage areas. When I was planning to paint the fireplace, I left the roller, brush, and paint can there so when I look around, I see the items staged to recall what I need to do and the items I need to do that task are ready to go. It's much easier to pop into an activity when you know you don't have to chase around and find items. If you have a few extra minutes, you can begin a project.
It's all about recognizing resources.
Ask yourself if changes you're making are going to help the new homeowners or not make a difference at all. I contemplated lifting the soffit in the kitchen, but it involved 3 air conditioning vents. When all was said and done, thousands of dollars but the rooms on both sides of the kitchen have vaulted ceilings, so there's no closed in feeling. I found a cheaper alternative to design window openings at the top of the wall that allow light to go back and forth from room to room and give a sense of light. With the upper cabinets gone, the room also seems taller.
I'm barely into the renovation, but I am accruing more and more knowledge and losing more and more weight, gaining more muscle, feeling confident, and seeing the actual mark of my work at the end of the day.
Along the way, I'll be sharing renovations, how decisions were made, and what I learned to be efficient and not spend more than absolutely necessary.


Comments
Post a Comment